")
I made a quiche! I know, I know. So what? I’m making things in the kitchen all the time, right? Um, well no. I do a fair bit of baking from time to time, but when it comes to cooking, I’m actually pre-tty lazy and uninterested.
Over the long Easter weekend I actually did some real cooking though. I decided to make a quiche because my sister used to make an amazing quiche (my sister is a badass cook, by the way). Her quiche is an absolute favorite of mine.
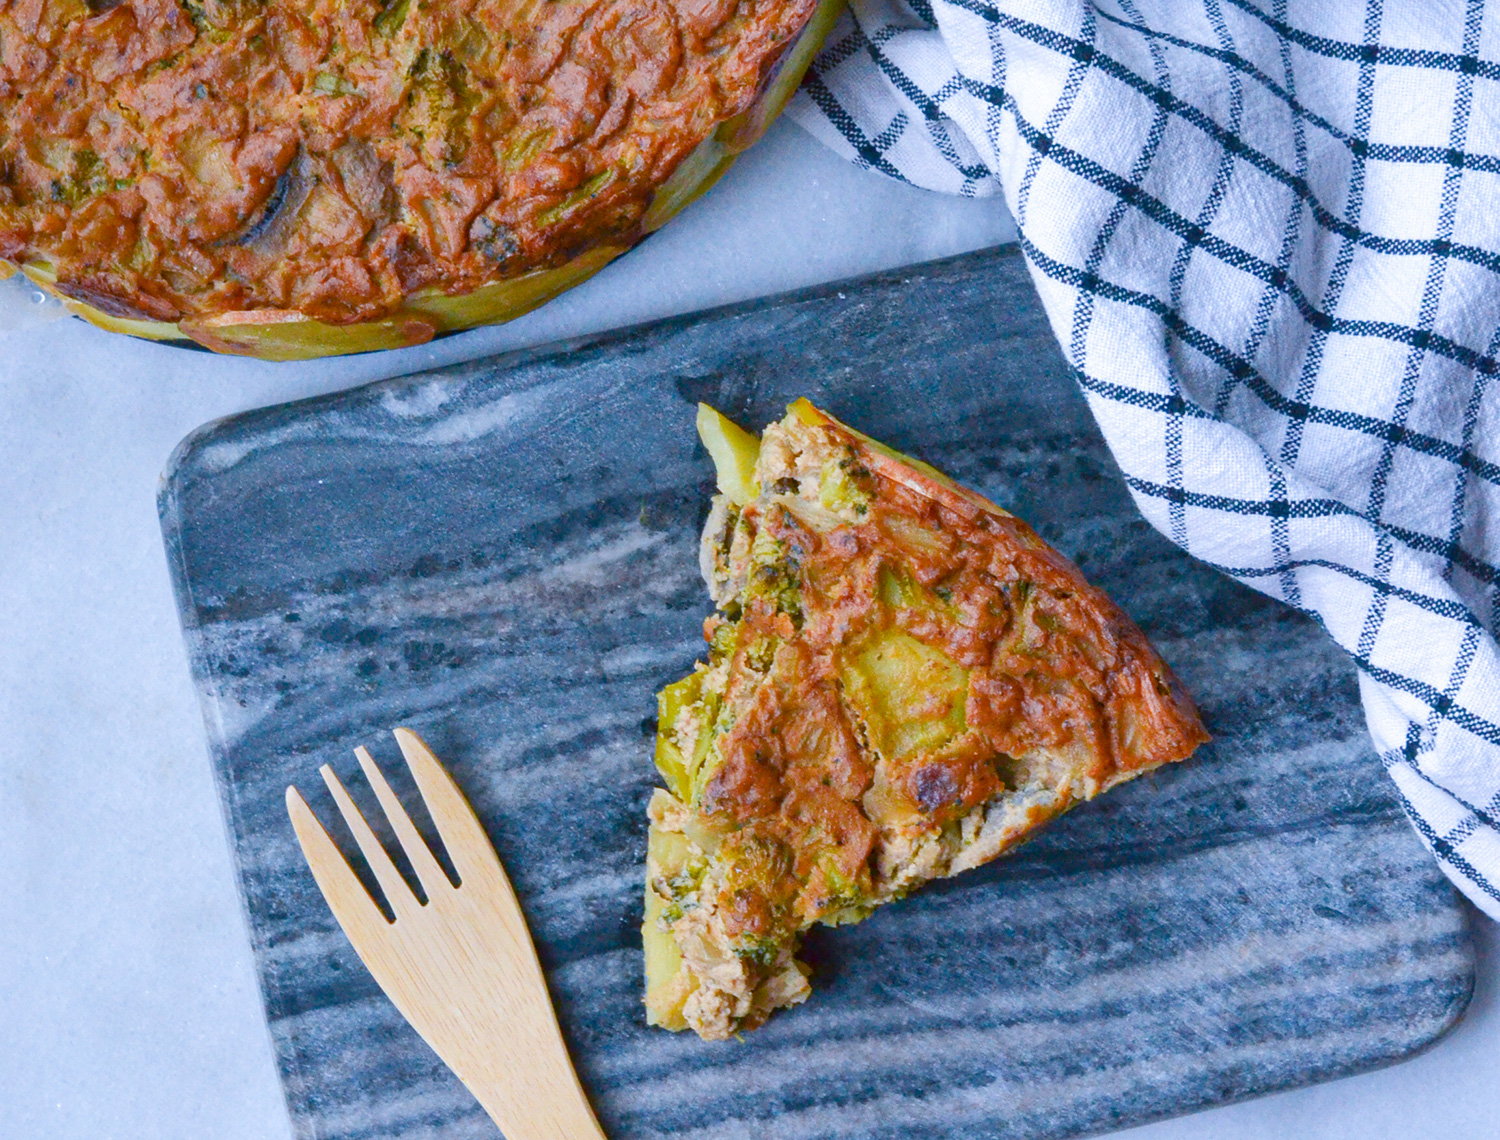
This quiche did not turn out half bad! I’m quite proud of it (can you tell?) I applied the same method as I often do when baking – the “let’s see what I have on hand and if maybe it works well together”-method.
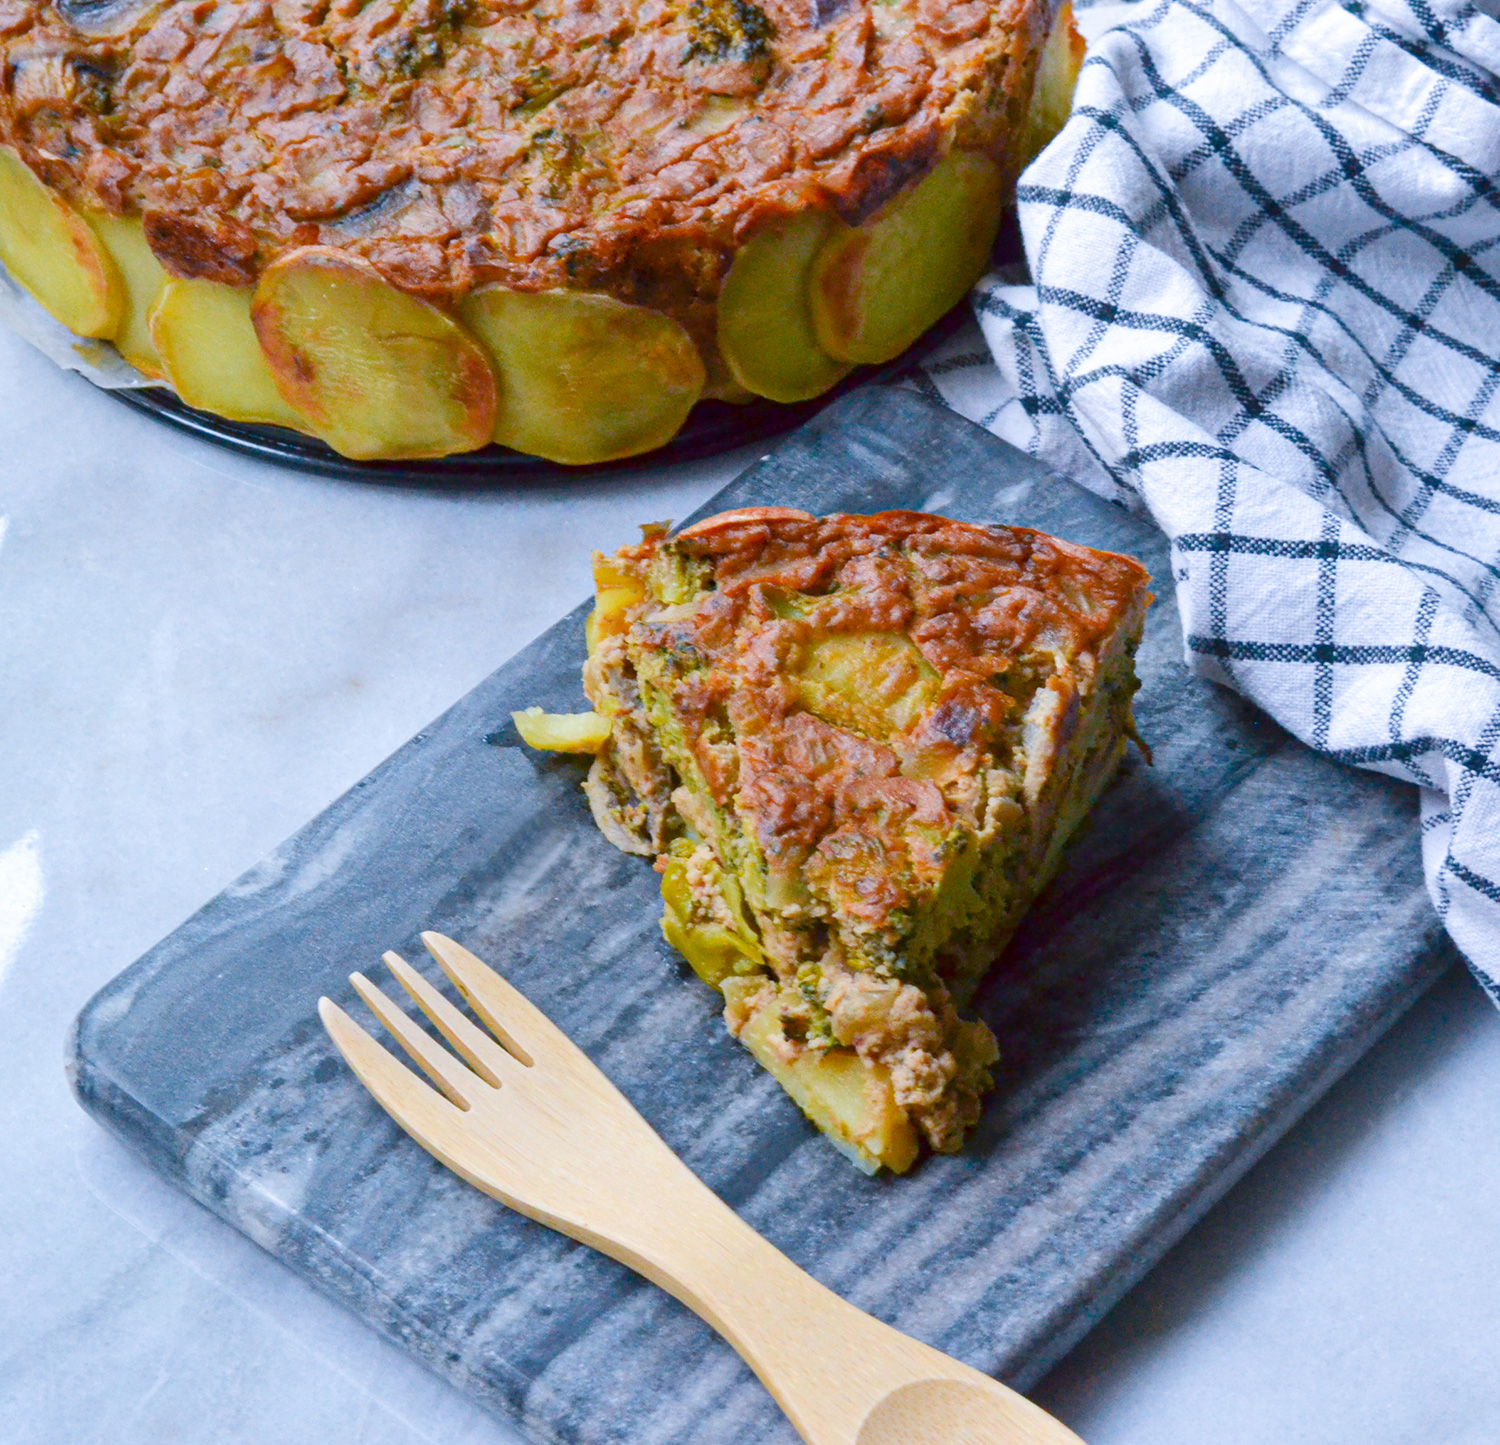
The fridge was hosting some left over potatoes, which I thinly sliced and used as a pie crust (which I guess makes this quiche gluten free too, if that’s a thing you care about). And some left over beans went in the blender with tofu and spices to make the filling that holds this quiche together.
Below is the recipe for this vegan Vegetable & Tofu Quiche, so that you can make it too!
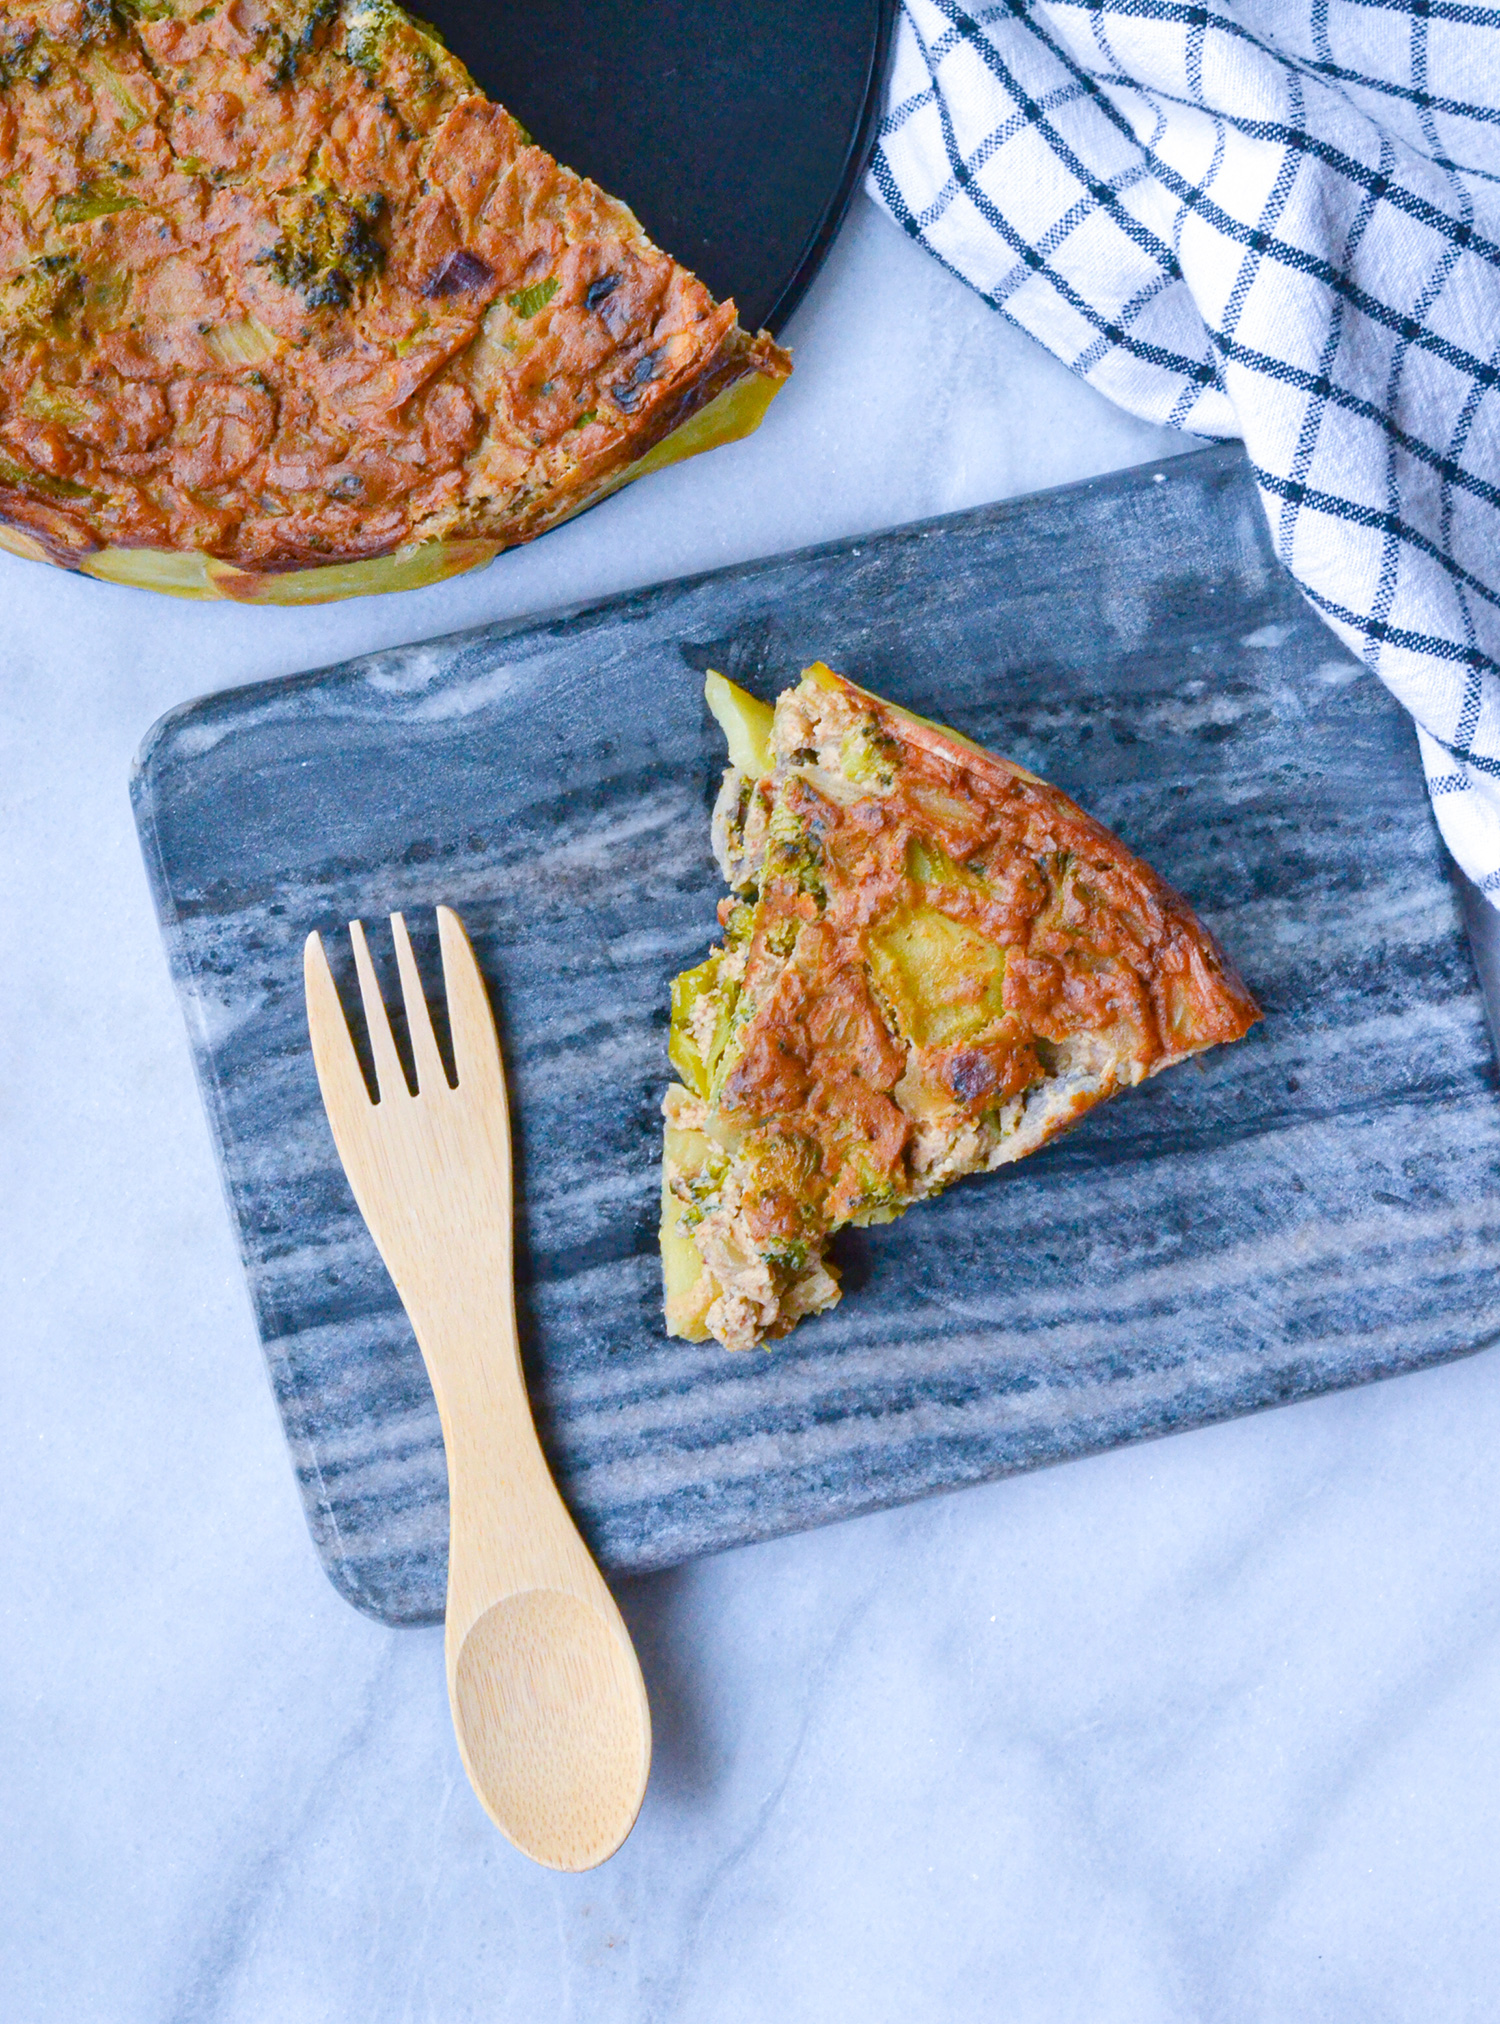
Vegetable & Tofu Quiche (Vegan)
Ingredients
5 medium sized potatoes
100 grams of cooked beans (any beans will work)
280 grams of tofu
1 1/2 tbsp nutritional yeast
1/2 cup soy milk
1 tsp smoked paprika
pinch each of salt & pepper
1 small head broccoli
1 yellow onion
1 clove garlic
8-10 button mushrooms
Method
- Heat the oven to 180C
- Peel and thinly slice the potatoes
- Grease a round or square oven proof dish with olive oil and then cover the base and sides with the sliced potatoes, I had two layers of the potato slices in the bottom. Bake in the oven for 15 minutes.
- Make the filling: mix the beans, tofu, soy nutritional yeast, soy milk, smoked paprika and salt & pepper in a blender until you have a smooth cream.
- Chop the onion, garlic, mushrooms and broccoli and lightly sauté in a little bit of oil.
- Mix the vegetables with the tofu mixture and then pour into the potato base. Bake in the oven for 40-45 minutes, cover with foil after half the time if it’s getting too brown on top.
- Allow to cool slightly before cutting into portions.
Enjoy!


